Hello and welcome aboard our June Stamp Of The Month Australasian Close to My Heart Blog Hop. If you have arrived here from Doreen’s Blog then you are in the right place. If you landed here by accident, no problem, please join in by following the link at the end of this post.


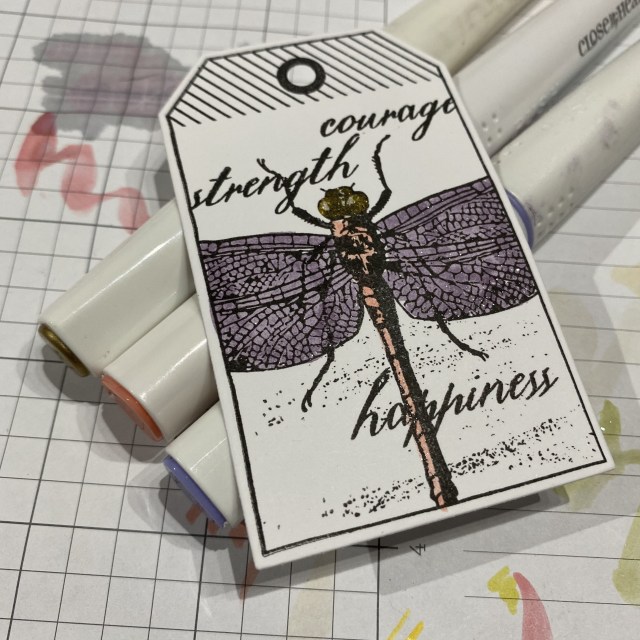
Today I would like to share with you some different colouring options which feature the Close To My Heart’s June Stamp of the Month “Garden Tags”.

The first step before colouring any stamp in is to choose and ink that suits your colouring medium. So you need to choose something that wont smudge or run. I choose to use the CTMH Intense Black Exclusive Ink. This ink is perfect for wet mediums and for alcohol markers. I do recommend that you stamp first and leave for an hour or so to set/dry completely. These tags also match perfectly with the Tags and Tabs Thin Cuts.
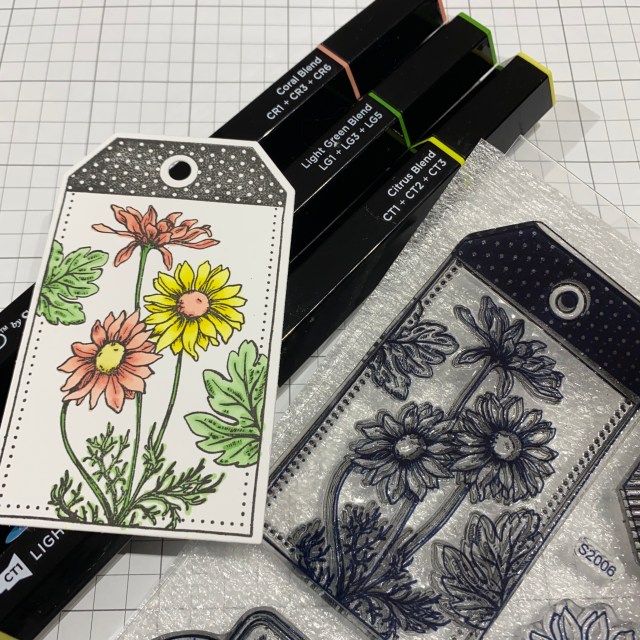
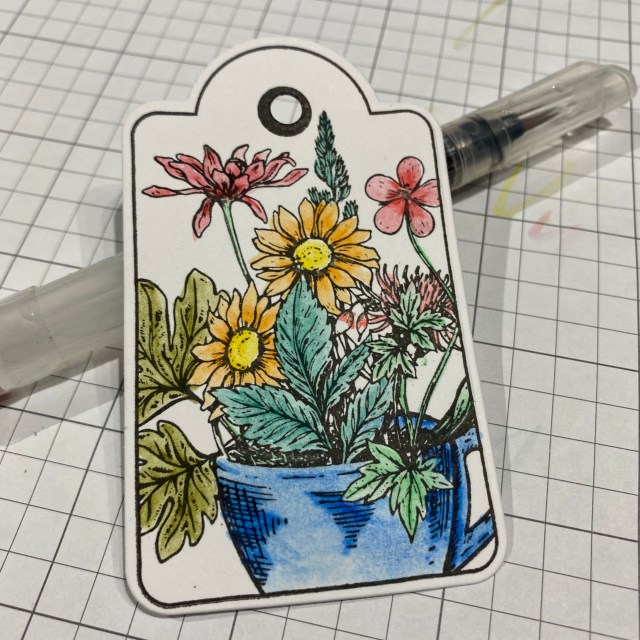
Alcohol Markers – Tri Blend Markers by Spectrum Noir.
I love these markers as you get three colour tones in the same marker. I have choose lighter colours, but in general markers give brighter more intense colours.
When working with the markers I use the darker tone first and add it to the areas that are the shadow areas (denoted by the use of hatching lines – short lines close together that suggest darker tones). I then blend over that the mid tones and finally the lightest tone. As each colour is added I colour over the previous colour and almost push the darker colour forward into the next space. You can also go back over lighter tones with the darker tones to create more distinct lines – see the large leaf.
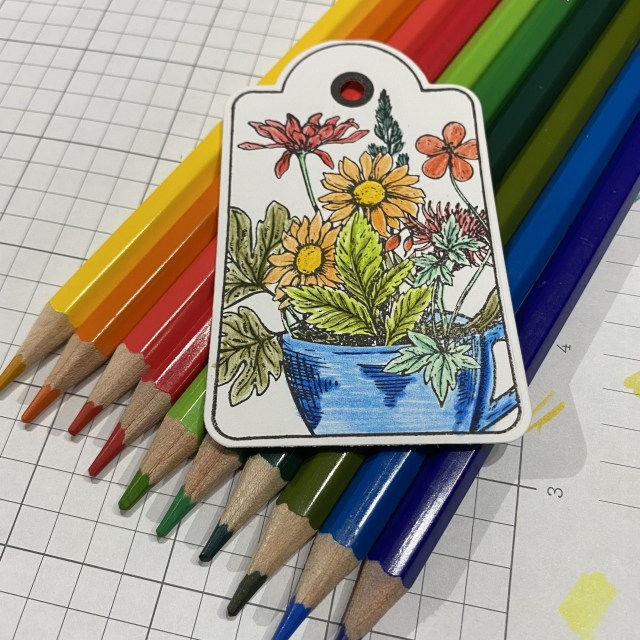
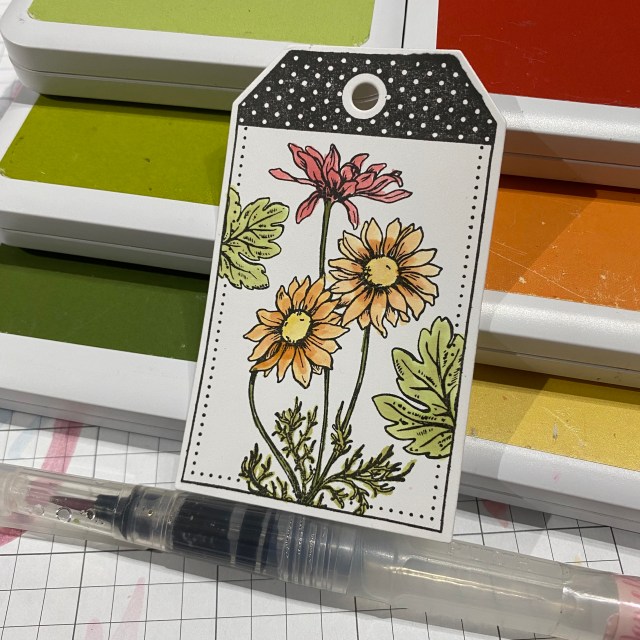
Water Colour Pencils – DRY
These can be used dry or blended with water. Using them dry is just like using any normal coloured pencil. I personally colour with the light colours first and go back in dark or with a dark pencil in the shadow areas.
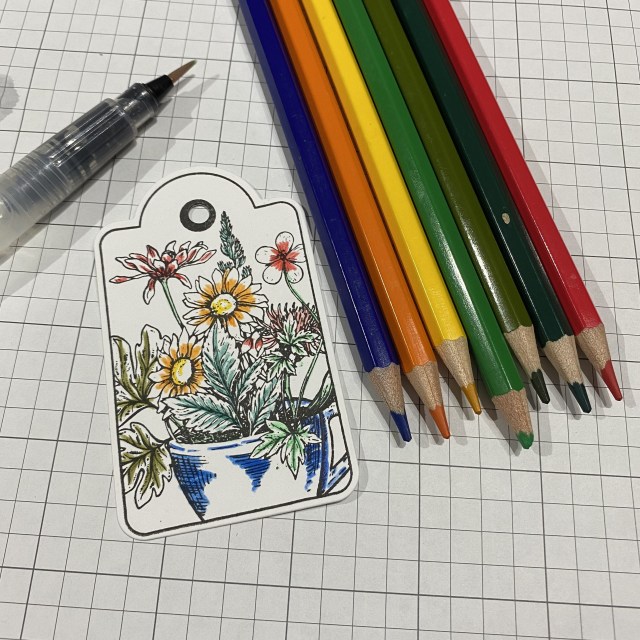
Water Colour Pencils – Wet
When I colour with water colours and know that I’m going to blend the colour with my small round water brush, I colour darkly in the shadow areas (picture above left). Then I use the water brush to spread the colour and make it softer in the highlights. Once dry you can also go back over with dry water colour pencil to add more precise details and shadows. CTMH offer a range of watercolour pencils.
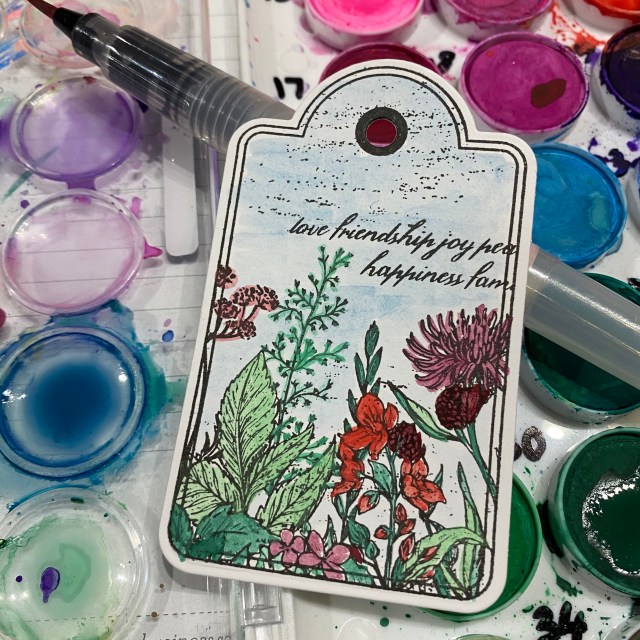
Water Colour Paints
Again using the Small Round Water Brush, I mixed my water colour paints and painted the picture. I painted the background wash first and didn’t get worried if I went over some of the finer flowers and leaves. I let it dry before adding colour to the leaves and flowers.
The more water you add to a colour the lighter it gets. The drier your brush the darker the colour.
The beauty of water colour is that you can go back once dry and still add more colour or even take colour away with water.
Waterbased Inks
If you don’t have water colour paints don’t stress. You can create a similar effect using your waterbased inks.
I used the CTMH Waterbased Exclusive Inks and the Small Round Water Brush Again. There are 42 colours in the range.
To do this I squeezed the closed ink pad so that ink is deposited onto the inside of the ink pad lid. I then use the brush just like in my watercolour paints. So more water make the colour lighter, as less water makes the colour darker.
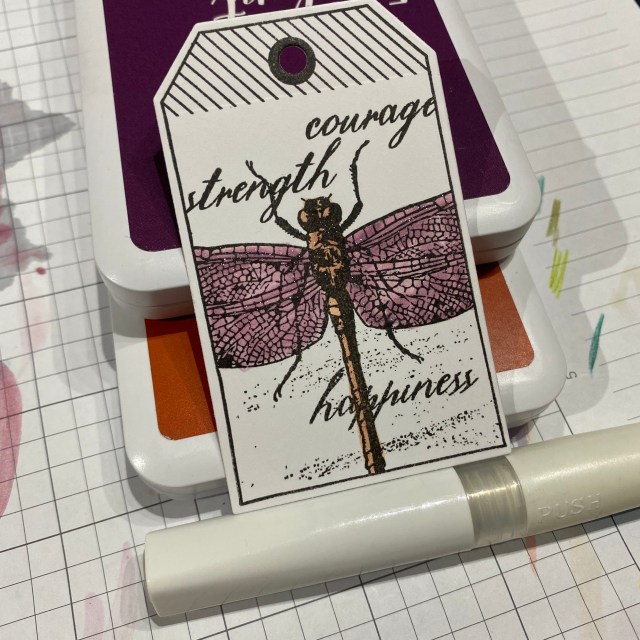
Shimmer Brush with Ink
Another option for the Waterbased Ink Pads is to use a Clear Shimmer Brush to paint the ink onto the paper. It gives you the colour of the ink whilst the shimmer from the Shimmer Brush.
I personally squeeze a drop of the shimmer brush into the lid of the ink pad. Mix it around with the ink and then use the shimmer brush like a normal paint brush. I dip it into the colour and the paint onto the paper.
Shimmer Brush – on its own.
There are currently 15 different Shimmer Brushes in the CTMH range. You can literally paint the colour onto the stamped image.
This exclusive Garden Tags Stamp of The Month is only available during June. It can be yours for just $9 with a qualifying order of $80 or for $34 if ordered separately from your CTMH consultant. If you do not have a consultant please contact me or place an order here.
I’d love you to leave a comment before heading off to the next stop Passionate About Pages.
Until next time – Happy Crafting
Danielle
xx


Love that you showed how all the different colouring techniques look like.
LikeLike
Glad you liked it.
LikeLike
Love all the different colouring techniques you featured, Dannii!
LikeLike
Thx Doreen. Xx
LikeLike
I love your demo of how you colour with the pencils dry and then smudge them to create the washed effect- very clever!
LikeLike
I love pencils.
LikeLike
Oh love all the colouring techniques you have shown here
LikeLike
Thx Maz
LikeLike
I love that you’ve showed so many different colouring techniques. My favourite is the shimmer brush.
LikeLike
Thanks I love it too.
LikeLike
Great post, TFS!
LikeLike
You’re welcome.
LikeLike
I loved your tips. I found them after trail and error on my part. I used water color pencils and blended with my shimmer brushes. I used the clear shimmer brush and got the best result. Thanks for taking the time to share your ideas.
LikeLike
You are so welcome. Yes clear shimmer brush with water colour pencils is great. Xx
LikeLike